Introduction
HPCBIO Portal is a menu-driven web interface to Life Science / Bio-medical computational resources at Computer Center, Bioinformatics Centre (BIC) and other organizations at NUS. Through this Portal, Life Science / Bio-medical researchers may access thirty applications for Docking, Modelling, Phylogeny, Sequence alignment & analysis, Protein classification & analysis. The Portal is designed to provide an integrated environment for users to submit and manage their jobs and their home / work space. Please browse the links below for further information.
- Logging in
- Managing files
- Applications
- Submitting a job
- Checking job status
- Typical work flow
Logging in
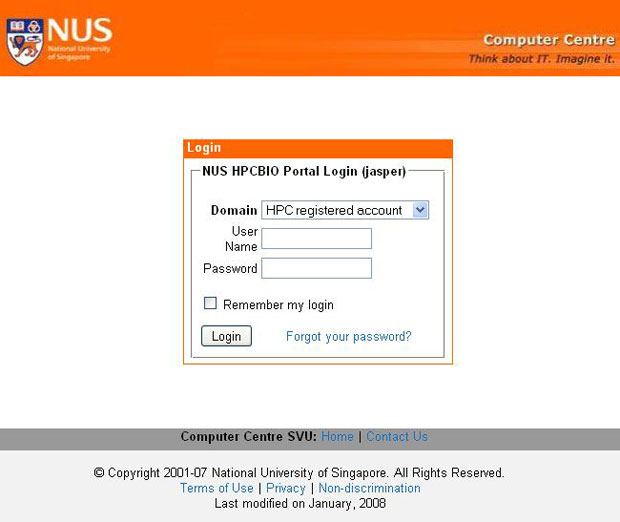
The HPCBIO portal url is https://hpcbio.nus.edu.sg/gridsphere. To access it, users must have a HPC account with Computer Centre. Those who do not can register at NUS HPC Portal. After successful registration, use the NUSNET ID and password to login to HPCBIO Portal.
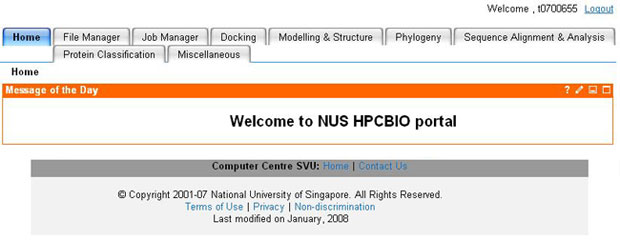
Once logged in, users will see the following home page. There are several tabs on the top frame. They are the File Manager, Job Manager and various application group tabs. The motd (Message of the Day) lists any current known problems with the portal server or service.
Managing files
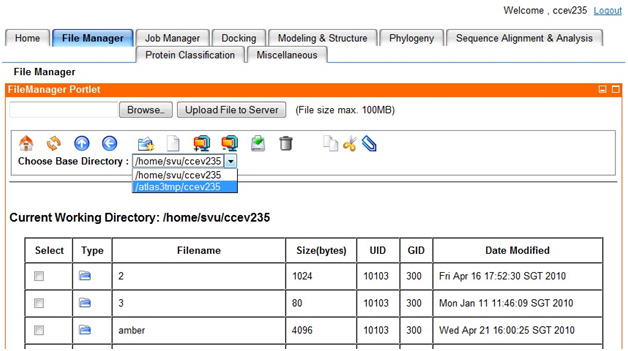
Management of user's home and temporary directory files is done through the File Manager. When this tab is selected, the user sees a listing of his home directory in his HPC account.
The listing shows information such as the file name, size and date. The icons at the top show the operations permissible on the files and directories. These include editing, listing, creating, deleting, moving, uploading, downloading and zipping. There are a few limitations: the maximum file size for upload to the server is 100 MB. Please zip the file(s) and try uploading the zipped file. Also, files of size greater than 1 MB cannot be edited/viewed.
Besides the home directory, each user is allocated a temporary directory in /atlas3tmp, which has a larger quota size than his home directory. This is recommended for large input/data or output/result files. A dropdown list at the top allows the user to select the directory to be used.
Applications |
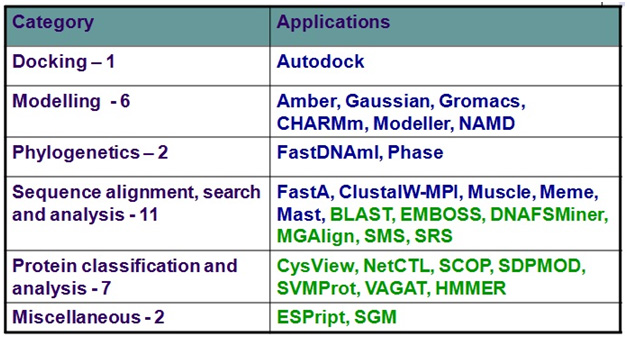
Currently, the Life Science / Bio-medical applications are grouped in 6 categories. Clicking on a tab will expand it to show the applications within each category.
- Docking
- Modelling & Structure
- Phylogeny
- Sequence Alignment & Analysis
- Protein Classification
- Miscellaneous
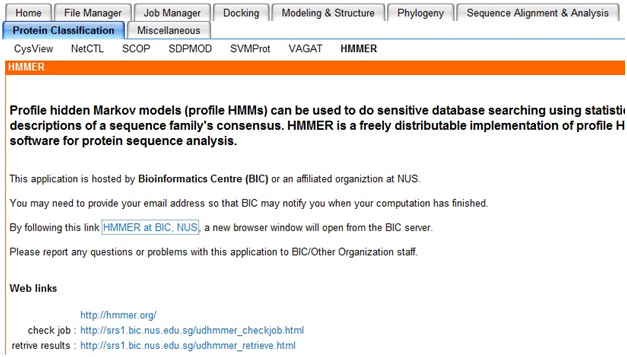
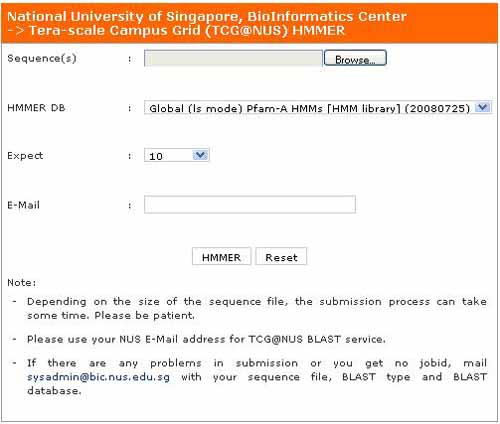
In the list of applications shown above, we note that some of the applications (those in green) run on non Computer Centre servers. For these, the user has to follow an additional web link for the application page to pop up. An example is seen below.
|
|
|
Submitting a job |
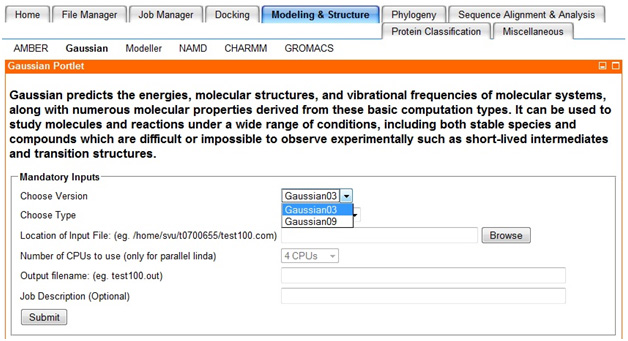
For the application selected (those hosted by Computer Centre - listed in blue), users need to select/complete the required fields:
- working directory
- input files / parameters
- output filenames
Note: there are currently 2 options for the working directory, ie., the user home directory or his directory at /atlas3tmp. The portal reads and writes files in the specified working directory.
The user does not need to select the server / queue on which to run his job. These are decided by the portal server based on the job requirements.
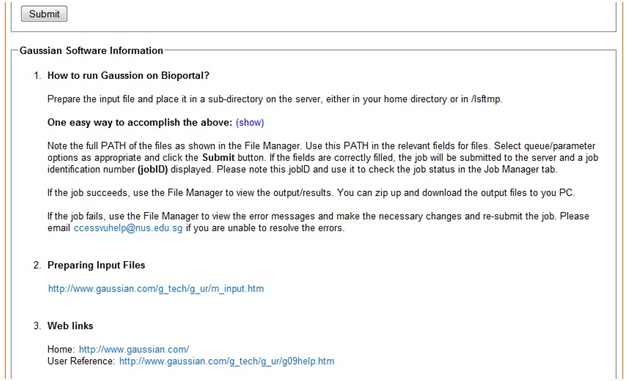
Note the Information section (below the submit button) where further help for entering the required fields may be found.
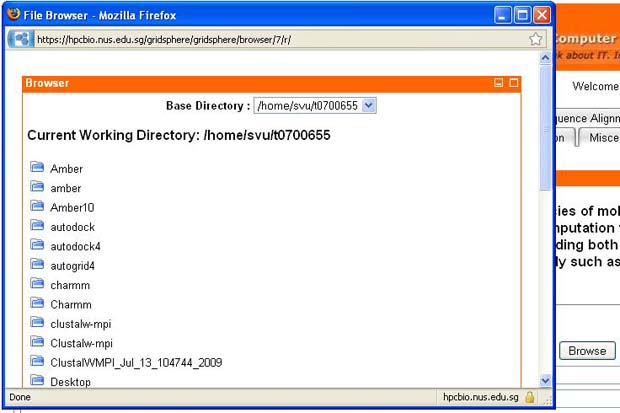
The Browse button allows the user convenient point and click selection of files.
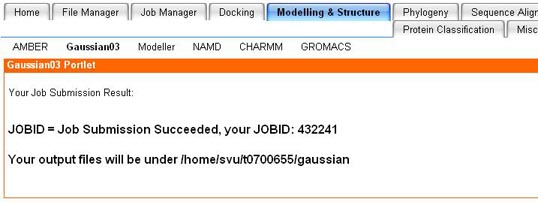
When all the necessary fields are entered, the user may click the Submit button. The portal server submits the job on the appropriate host / queue. Note the JOBID that is returned.
For applications not hosted by CC (listed in green), users must fill in the mandatory inputs in the form depending on the application. The user's email is usually required. The results will be emailed to the user.
|
|
|
Checking job status |
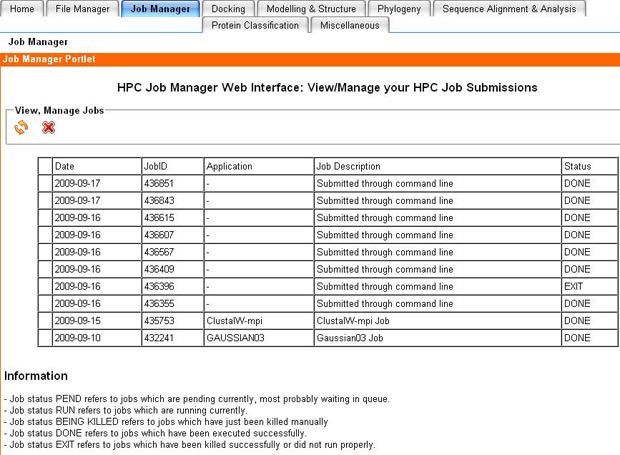
| The Job Manager shows the status of user's submitted jobs for applications hosted and run on Computer Centre resources (other applications are not shown). When the user clicks the link, the portal initiates checking of the user jobs status on the backend job management system. If they are completed successfully (DONE), it copies back the relevant output files to the user's working directory and updates the job status. The job listing also shows entries for jobs not submitted through the portal. The user may terminate / kill jobs still in PEND or RUN state.
|
For applications not hosted by Computer Centre, there is usually no JobID returned and the result files are normally emailed to the user. |
|
|
Typical work flow |
Example of the work flow for a typical job (application hosted on Computer Centre server):
- 1. Create application input files. Upload to portal (if needed)
- 2. Fill in application form (select working directory, enter mandatory inputs) and submit job
- 3. Note JobID, periodically check job status through Job Manager
- 4. If job status is EXIT, resolve error / send email to hpcbio
- 5. If job status is DONE, go to File Manager to view results/output
- 6. Download result/output to local machine (if needed)
- 7. Repeat steps 1 to 6 for another job
|
 Registration Guide Register for HPC Access to HPCNew User Guide How to Run Batch Jobs